Customize data displayed in the interactive table
This example shows how to display specific PCB component attribute information from the interactive component table.
Before following these steps, you need to log in to the web application.
-
Click Assembly
 and open a PCB design.
If you are not logged in, nothing happens when you click the command.
 -
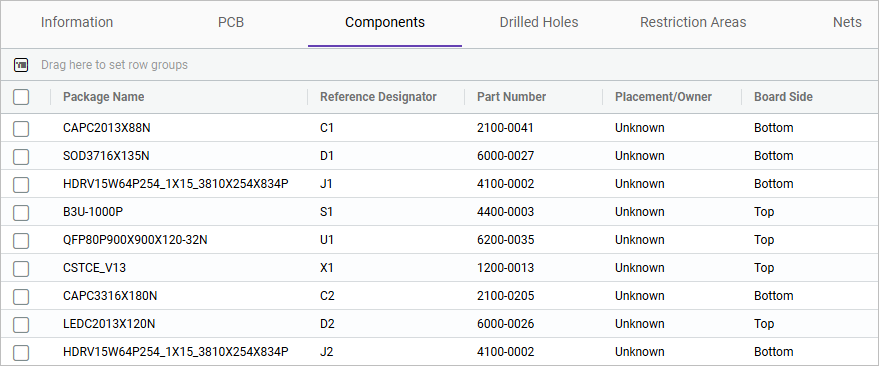
On the Assembly main page, click the Component tab and explore the table structure including column headers and rows, to understand the data it contains.
In this example, the table shows the data for five PCB entity attributes, each presented in its corresponding column.
-
To customize the table display, click the Columns
panel.
Notice that some entity attributes are currently not selected for display in the table. You have the option to choose and select them to be included in the table view.
-
In the Columns panel, drag the Part
Number to the top of the list to rearrange the table and set the
Part Number as the first column.
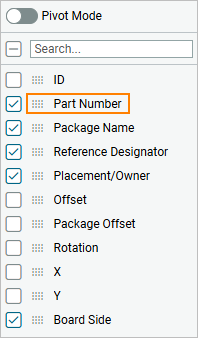 You also can rearrange the column in the table by dragging and dropping the column header into the desired order.
 -
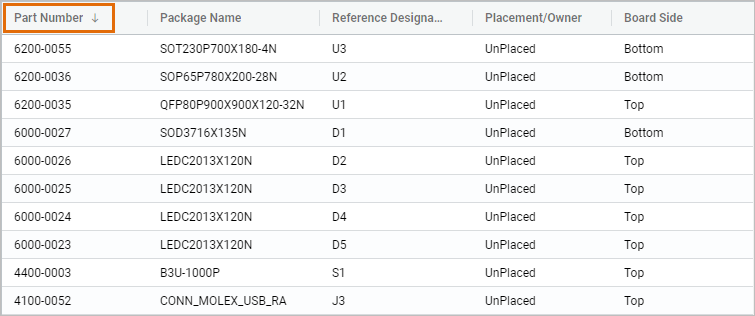
In the main window, click the Part Number header to sort
the part numbers in descending order.
- In the Columns panel, clear, for example, the Placement/Owner check box to remove this column from the Component table, as it does not contain valuable data.
-
To explore only the top board side component data, hover over a Board Side column heading, click the column options
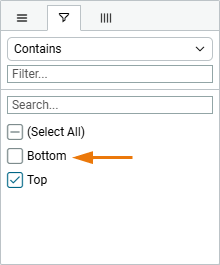
 to open the quick access commands, choose the column filter, and clear the Bottom check box.
-
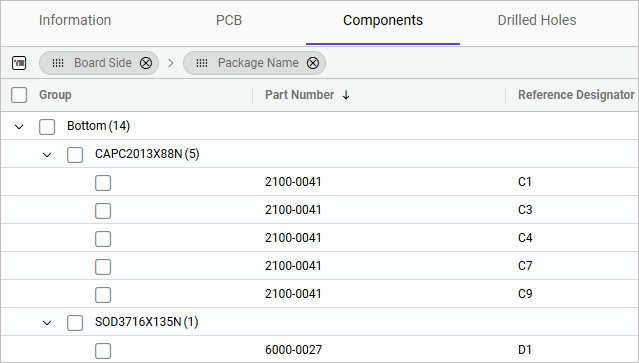
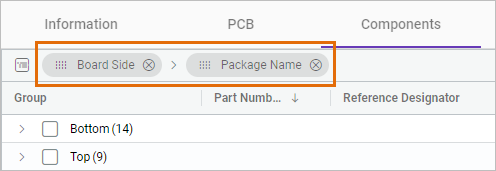
To group the components data by the board side and the package number, drag and
drop the Board Side and Package
Name headers to the grouping row.
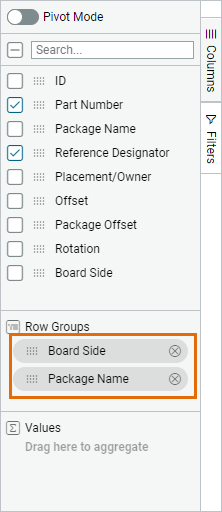
 You can also group the data using the Columns toolbox.
-
To display full set of data in the grouping, hover over a Group column heading. Click the column options
 to open quick access commands and choose Expand All Group Rows.
