Install IIS role
This procedure shows how to install the IIS role on the Server Manager and activate the .NET framework features if necessary.
Ensure that you have administrator rights to install all the prerequisites on a Windows server.
The installation of the NX PCB Exchange Connect services and web application requires that the .NET framework features must be activated on the Server Manager.
- From the Start menu, launch Server Manager.
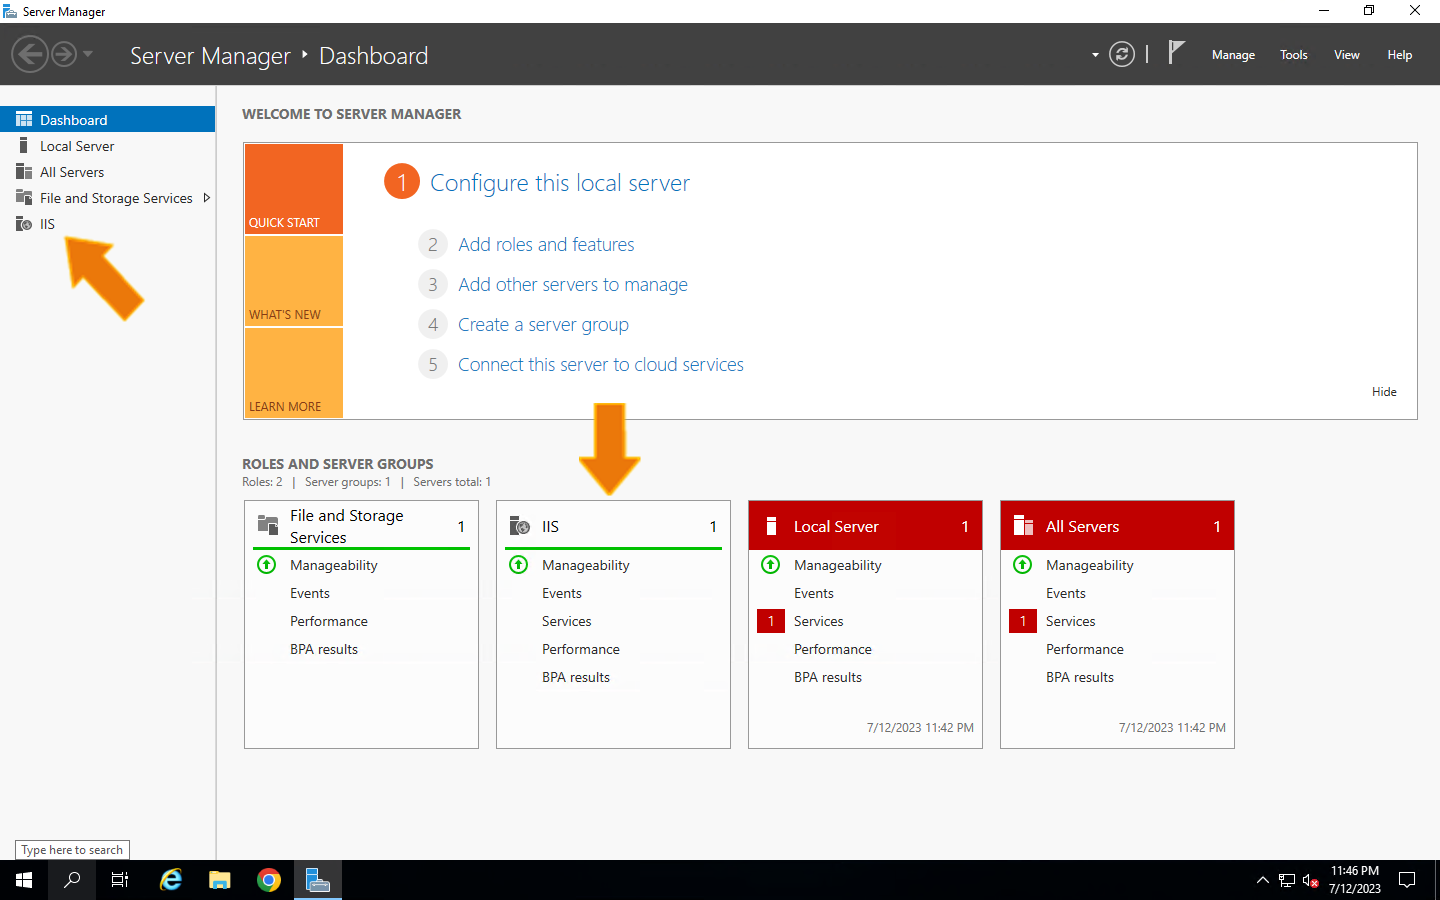
- In the Server Manager window, select Dashboard.
-
On the Dashboard page, choose .

- On the Before you Begin page, click Next.
- On the Select Installation type page, select Role-based or feature-based installation and click Next.
- On the Select destination server page, select Select a server from the server pool, verify that the correct server is selected, and click Next.
-
On the Select server roles page, select Web Server (IIS).
Add Roles and Features Wizard pop-up window opens.
- In the pop-up window, click Add Features.
- On the Select server roles page, click Next.
-
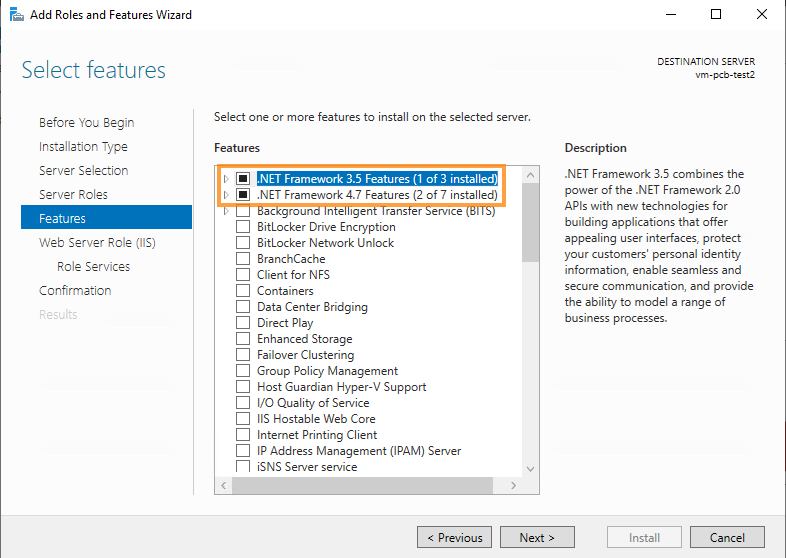
On the Select features page, ensure that the .NET Framework Features have been enabled.

- On the Select features page, click Next.
- On the Web Server Role (IIS) page, click Next.
- On the Select role services page, click Next.
- On the Confirm installation selections page, click Install.
- Restart the server to finish the installation.
- Redo steps 1 to 6.
-
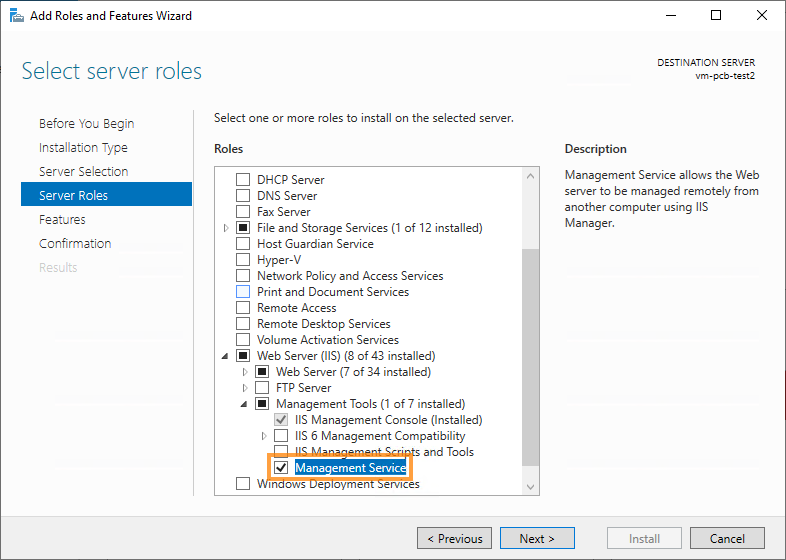
On the Select server roles page, in the Roles list, expand Management Tools and select Management Service.

Add Roles and Features Wizard pop-up window opens.
- In the pop-up window, click Add Features.
- On the Select role services page, click Next.
- Click Next on all other pages.
- On the Confirm installation selections page, click Install.
- On the Results page, click Close.

